
How would you like to see your company or team insignia transformed….from an idea or a drawing perhaps… into a symbol of pride that you’ll be proud to wear?

Converting graphic designs and embroidering that design on any material is very much an art as well as a science. It requires the knowledge, right tools, and most importantly, patience to make this happen.
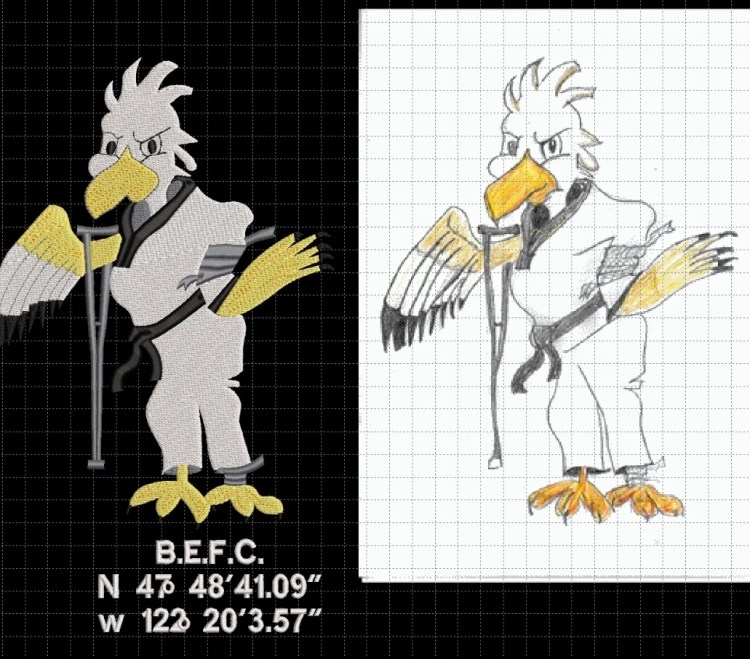
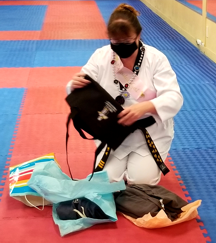
We just finished a custom project for a customer. She has a talent for drawing and is passionate about martial arts. She drew a beautiful and intricate “B.E.F.C.” logo and asked if I can embroider it on a few items: a tote bag, several sun visors, and three different brands of jackets. The “package” was going to be presented to a very good friend, her B.E.F.C. co-founder for her 50th birthday.
Judging from the intricacy of her design, I knew I’ll need to roll up my sleeves for this one. So game on! Challenge accepted!
STEP 1: DIGITIZING THE DESIGN
One of the first steps I had to do is digitize the design in three (3) different sizes. Resizing an embroidery file isn’t just like enlarging a photo like you’re using MS Powerpoint or MS Word. You can only resize so much without losing the quality. For images, you need a special graphic editing software like Corel Draw or Adobe Illustrator to make sure you retain the quality. For embroidery, we use a special embroidery digitizing software as well. After a few hours, I finished the first iteration. I sent it to my customer to review.
While waiting for her thumbs up, prepared the materials to do the sew-outs. We do at least 2 sew-outs for every size/design.
STEP 2: SEW-OUT
What’s a “sew-out”? It’s a stitch out of the embroidery design. This is part of the package we provide to clients with volume orders. The goal is to make sure that the client sees how the design looks as it is stitched on the fabric before we embroider the actual items.
For the sew-out, I looked for fabric that’s as close as possible (in terms of color and material type) to the final fabric. We have half a room full of fabric so 95% of the time, I’m able to find something from our supplies. If it’s the first sew-out and I can’t find the right color, I’d go for the closest material type. The first sew-out is just for me anyway. I’m looking for details to confirm that how it looks on the screen is the same as how it is on the material. If I find some flaws or came up with ideas on how to improve the way it’s digitized, I’d go back to the digitizing software to make edits. We practice kaizen in our shop.. . So 99% of the time, we tweak the design to make it better.
STEP 3: EMBROIDERY PROCESS
SUNVISORS
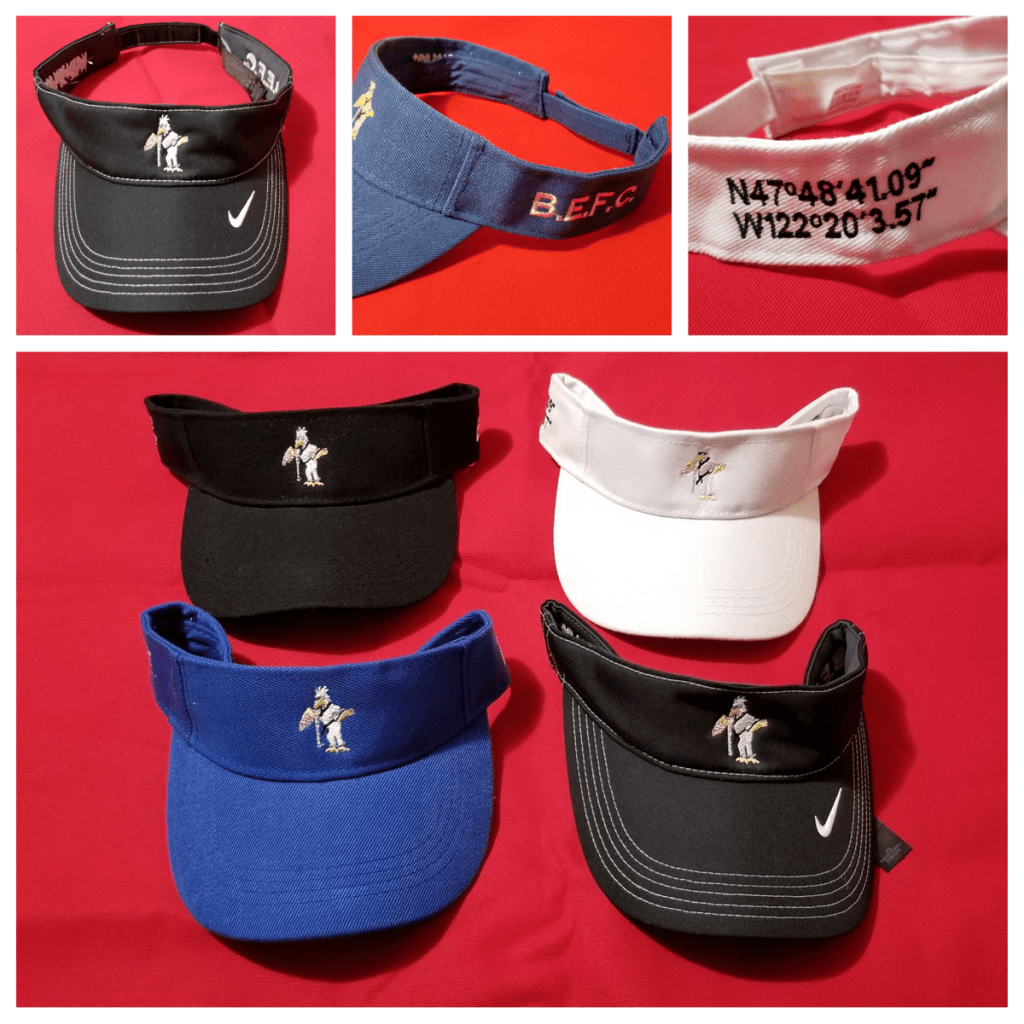
My client LOVES sunvisors! From the beginning, I knew that though this is the smallest item, it will present a new challenge for us. The visor has a limited embroidery field (2-2.5 inches tall in front; 1.5 in. on the sides) so I had to get creative with the placement and in hooping the item. My client & I decided to keep the eagle design in the front, and put the group name and the GPS location on each of the sides. This way, we can make the logo as big as possible. Ironically, it’s the tiniest logo that took me the longest to do!
JACKET BACK
The jacket back was #2 in terms of complexity. The good news is because you have a bigger embroidery field, you can do a lot more. But as the scripture says, “To whom much is given, much will be required” (Luke 12:48). There was this pressure to make sure that this logo reflects as much of the details there is in that 3 x 3 in. image she emailed me. (I have to admit that it was a self-imposed pressure. My client was very nice and easy-going. This is just ME wanting to deliver as perfect a product as possible!). So for the jacket back, I used a couple of extra thread colors to helped with giving the artwork more dimension. I used our magnetic hoops to hold the jackets during embroidery.
CHEST & CANVAS BAG LOGO
The logo we used for the chest and the bag was the easiest to digitize I had enough space so I was able to embroider the image and the text together. I used my strongest magnetic hoop and made the logo as big as possible. There were three different jacket materials though. A couple of them were thinner (knit poly/cotton) type so I had to prep and reinforce the fabric well before embroidering.
STEP 4: DELIVERY
The most fun part of this project is seeing smiles all around the room when the birthday girl opened her presents.
This is just one of our transformation projects. For more examples, check out our portfolio.
If you want to see your logo immortalized via embroidery, contact us.
